How to Test a Mobile Proxy?
A step-by-step guide to verifying your mobile proxy works correctly: IP routing, reputation check, DNS leak, WebRTC leak, browser fingerprint, speed and latency, sticky session tests, and a real-world test on your actual target, with tools and fixes for every failure.

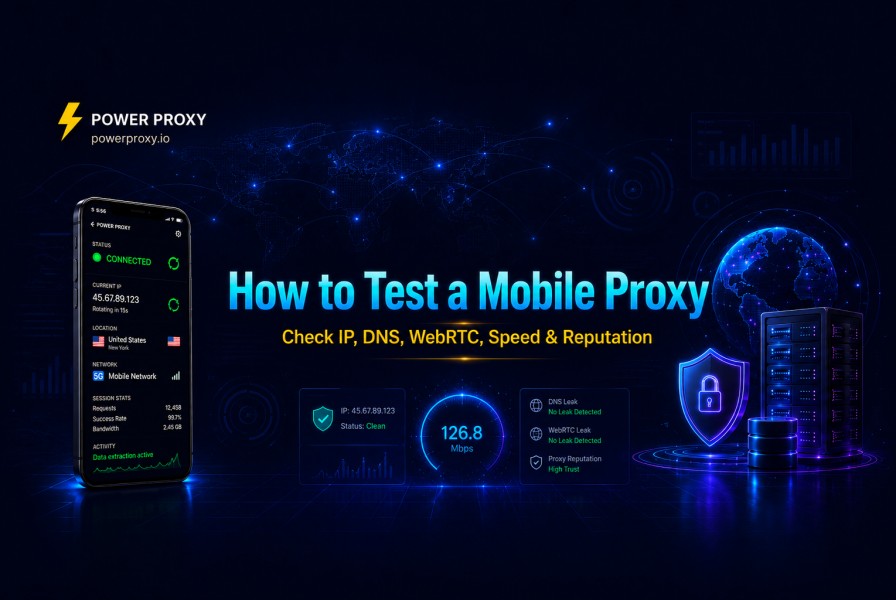
Setting up a mobile proxy is only half the job. Before running any automation, scraping workflow, or account management task, you need to confirm the proxy is actually working, routing your traffic correctly, and not leaking information that could expose your real identity or location.
Most proxy failures trace back to one of three problems: the IP is not routing correctly, there is a DNS or WebRTC leak sending requests outside the proxy tunnel, or the connection is too slow or unstable for the workload. This guide walks through each test in order so you can confirm everything is working before putting the proxy to use.
Why Testing Matters Before You Start
A proxy that appears configured is not necessarily a proxy that is working. The most common failure mode is silent: traffic bypasses the proxy entirely and continues to use your real IP, or DNS requests resolve through your ISP instead of the proxy tunnel. Neither failure produces a visible error. Everything appears to work until the target platform detects your real location, flags your session, or bans your account.
Testing takes under ten minutes. Skipping it is how accounts get burned before a single real task is run.
Step 1: Verify the Proxy Is Actually Routing Your Traffic
Before anything else, confirm that websites are actually seeing the proxy IP instead of yours. This is the most fundamental test and the one most often skipped.
What to Check
What a Correct Result Looks Like for a Mobile Proxy
The IP shown should be different from your real IP. The ISP or organization field should show a mobile carrier name, not a hosting provider or datacenter name. If you see "Amazon Web Services," "OVH," or "Hetzner" in the ISP field, the connection is not routing through genuine carrier-grade mobile infrastructure.
whatismyipaddress.com — Shows IP, country, city, and ISP. Fast and straightforward for a basic check.
ipinfo.io — Shows IP, ASN number, organization, and carrier classification. More detail than a basic IP checker and useful for confirming the ASN type.
Step 2: Check IP Reputation and Carrier Classification
Confirming the proxy is routing traffic is not the same as confirming the IP has good reputation. An IP can belong to a mobile carrier and still carry a poor fraud score from prior misuse. Anti-bot systems at platforms like Instagram, Cloudflare, and DataDome query IP reputation databases before processing any session logic. A high fraud score means the IP will be treated with suspicion before you do anything.
Why Carrier ASN Matters
Every IP belongs to an Autonomous System Number (ASN), which identifies the network operator. Mobile carrier ASNs receive structurally lower risk scores because carriers share a single public IP among hundreds of real subscribers through CGNAT. Blocking that IP means blocking all of them, so platforms are more cautious about doing so. Datacenter ASNs serve servers, not people, and receive higher baseline risk scores regardless of what the individual IP has done.
Tools to Use
What Good Results Look Like for a Mobile Proxy
On IPQualityScore, a fraud score of 0-20 indicates a trusted IP. Scores between 21-60 are flagged as suspicious. Anything above 75 is typically blocked outright by platforms using IPQS data. A genuine carrier-grade mobile IP that has not been abused should score in the 0-20 range. If the score is already elevated before you have used the IP for anything, the subnet may be contaminated from previous users. In that case, request a replacement from a different IP block.
On Spur.us, a clean mobile proxy should show as a carrier-assigned residential or mobile IP with no proxy or VPN flags. If Spur flags it as a datacenter or commercial proxy, the IP will fail detection on platforms that query Spur directly.
Different platforms use different reputation vendors. An IP that scores clean on IPQS may still be flagged on Spur, and vice versa. Run both checks before using an IP for any high-stakes workflow. If either returns a high risk score before you have done anything with the IP, treat it as contaminated and request a replacement.
Step 3: Run a DNS Leak Test
What a DNS Leak Is and Why It Matters for Proxy Users
When you visit a website, your device first asks a DNS server to translate the domain name into an IP address. If you are using a proxy, that DNS query should route through the proxy tunnel. A DNS leak happens when your device sends DNS queries directly to your ISP's DNS servers instead, bypassing the proxy tunnel entirely.
The practical consequence is that your ISP can see every domain you are querying, even when your HTTP traffic appears to be going through the proxy. Some anti-fraud systems also correlate DNS origin with connection origin. If your HTTP request comes from a carrier IP in Amsterdam but your DNS query resolves through an ISP in your home country, the mismatch is a detection signal.
How to Test for DNS Leaks
How to Fix a DNS Leak
Firefox: Go to Settings, scroll to Network Settings, enable DNS over HTTPS, and make sure Proxy DNS is enabled when using SOCKS5.
Chrome: Go to Settings, Privacy and Security, Security, and enable Secure DNS using a custom DNS provider like Cloudflare (1.1.1.1) or Quad9 (9.9.9.9).
Python scripts: Use socks5h:// instead of socks5://. The h suffix passes the hostname to the proxy server for remote DNS resolution, preventing local DNS leaks entirely.
socks5:// resolves DNS locally before sending through the proxy. This leaks DNS queries to your local resolver.
socks5h:// passes the hostname to the proxy server for remote resolution. This prevents DNS leaks entirely for script-based workflows.
Step 4: Run a WebRTC Leak Test
Why WebRTC Bypasses Your Proxy
WebRTC is a browser technology built for peer-to-peer audio and video communication. To establish direct connections, it uses the ICE protocol to collect every network address the browser can reach, including your real public IP. These addresses are available to any website via JavaScript, regardless of whether a proxy is active.
HTTP and HTTPS proxies only tunnel TCP traffic. WebRTC uses UDP for its STUN requests, which bypasses HTTP proxy tunnels entirely. For browser-based proxy workflows, including social media account management and any automation done through a browser, WebRTC leaks are one of the most common causes of detection.
How to Test for WebRTC Leaks
Visit browserleaks.com/webrtc with your proxy active. If your real ISP IP appears anywhere in the results, you have a WebRTC leak. Only the proxy IP should be visible.
How to Disable WebRTC by Browser
Firefox: Open about:config, search for media.peerconnection.enabled, set it to false. Completely disables WebRTC. Use a separate profile for video calls.
Chrome: Install uBlock Origin or WebRTC Leak Prevent and set it to disable non-proxied UDP. For automation, launch with --force-webrtc-ip-handling-policy=disable_non_proxied_udp.
Brave: Settings → Privacy and security → WebRTC IP Handling Policy → Disable non-proxied UDP.
Safari: More conservative than Chrome by default. For complete elimination, disable WebRTC under Develop → Experimental Features.
Anti-detect browsers typically include WebRTC spoofing per profile. Verify the setting is active after every browser update, as major updates can reset these configurations.
Step 5: Check Browser Fingerprint Consistency
IP reputation and leak tests confirm the network layer is clean. But even with a perfect mobile proxy IP, a mismatched browser fingerprint can expose your session. Modern anti-bot systems, especially on Instagram, TikTok, and LinkedIn, score multiple signals together: IP type, device fingerprint, timezone, language, screen resolution, WebGL renderer, and browser behavior. A carrier-grade mobile IP paired with a fingerprint that looks like a Windows desktop on a datacenter connection will still fail.
Why Fingerprint Consistency Matters
A mobile proxy routes traffic through a real carrier network. But if the browser fingerprint signals a Windows 11 desktop machine while the IP claims to be a mobile carrier connection, the combination is inconsistent. Detection systems flag this mismatch. The IP and the fingerprint need to tell the same story.
This is particularly relevant for multi-account workflows. Two accounts sharing an identical browser fingerprint can be linked even when they use different proxy IPs. The fingerprint layer needs to be isolated per account, not just the IP layer.
Tools to Check Your Browser Fingerprint
What to Look for
The timezone and language settings in the browser should match the location of the proxy IP. If the proxy is in Amsterdam, the browser timezone should be Europe/Amsterdam and the language should be consistent with that region. A browser set to US English with Eastern Time connecting through a Dutch carrier IP is a detectable inconsistency.
On pixelscan.net, the consistency score should be high. A low score means the browser signals and network signals are contradicting each other. On CreepJS, a low trust score or flagged vectors indicate that the fingerprint has detectable anomalies that bot detection systems would score negatively.
For any workflow managing multiple accounts, each account should have a completely isolated browser fingerprint, not just a different IP. Anti-detect browsers create separate profiles where canvas, WebGL, fonts, screen resolution, and timezone can each be configured per profile. The proxy handles the IP layer. The browser profile handles the fingerprint layer. Both need to be consistent and isolated for the setup to hold.
Step 6: Test Proxy Speed and Latency
Latency vs Throughput: Which Matters More
For most proxy use cases, latency matters more than throughput. High latency causes timeouts, session drops, and irregular request timing that platforms flag. Throughput matters primarily for bandwidth-heavy tasks like downloading large datasets.
Real-world 4G LTE latency typically ranges from 30-70 milliseconds, while 5G latency ranges from 15-40 milliseconds under normal conditions, according to Ookla H2 2025 network data. A well-configured mobile proxy should show latency in the 50-150 millisecond range. Anything consistently above 300 milliseconds will cause issues at scale.
How to Run a Speed Test Through a Proxy
Connect through your proxy, then visit Speedtest.net or Fast.com and run the test. Record download speed, upload speed, and ping. Run at different times of day and compare with and without the proxy to understand the overhead added by the proxy connection.
For a more precise measurement, use curl from the command line:
curl -x "http://user:[email protected]:PORT" \
  -o /dev/null \
  -w "Connect: %{time_connect}s | TTFB: %{time_starttransfer}s | Total: %{time_total}s\n" \
  https://httpbin.org/get

curl -x "http://user:[email protected]:PORT" \
  -o /dev/null \
  -w "Speed: %{speed_download} bytes/sec\n" \
  https://speed.cloudflare.com/__down?bytes=10000000
Diagnosing Latency Problems with mtr and traceroute
High latency is often a routing problem rather than a proxy problem. When response times are unexpectedly high, the delay may be happening at a specific network hop between your machine and the proxy server, not at the proxy itself. mtr and traceroute show the full path a packet takes and identify exactly where the delay is occurring.
# mtr: real-time traceroute with per-hop latency (Linux/macOS)
mtr proxy.powerproxy.io

# traceroute: classic hop-by-hop path analysis
traceroute proxy.powerproxy.io   # macOS/Linux
tracert proxy.powerproxy.io      # Windows

# ping: baseline round-trip time
ping -c 10 proxy.powerproxy.io
In the mtr output, look for a hop with significantly higher latency than the hops before and after it. That hop is where the delay is introduced. If the high-latency hop is in the public internet path before reaching the proxy, the issue is a routing problem outside the proxy's control. If it is at the proxy itself, contact the provider. If ping to the proxy is fast but requests through the proxy are slow, the bottleneck may be at the proxy's outbound connection to the target site.
Testing Speed in Python
import requests
import time

proxies = {
    "http":  "http://user:[email protected]:PORT",
    "https": "http://user:[email protected]:PORT"
}

start = time.time()
r = requests.get("https://httpbin.org/get", proxies=proxies, timeout=10)
elapsed = time.time() - start
print(f"Status: {r.status_code} | Response time: {elapsed:.2f}s")
Expected Performance Benchmarks for Mobile Proxies
| Metric | 4G mobile proxy | 5G mobile proxy |
|---|---|---|
| Latency (ping) | 50-120 ms | 30-80 ms |
| Download speed | 10-50 Mbps | 50-200 Mbps |
| Response time per request | Under 300 ms | Under 150 ms |
| Uptime | 95%+ | 99.9% |
Step 7: Test Sticky Session Behavior
Why Session Consistency Matters
Many workflows require the same IP to remain stable across multiple requests: logging into an account, navigating through a multi-step form, following a redirect chain, or managing a social media session. If the IP changes mid-session, most platforms trigger re-authentication, security checks, or outright blocks.
How to Verify a Sticky Session Is Holding
import requests

proxies = {
    "http":  "http://user:[email protected]:PORT",
    "https": "http://user:[email protected]:PORT"
}

ips = []
for i in range(5):
    r = requests.get("https://ipinfo.io/ip", proxies=proxies)
    ips.append(r.text.strip())
    print(f"Request {i+1}: {r.text.strip()}")

if len(set(ips)) == 1:
    print("✓ Sticky session holding — same IP across all requests")
else:
    print("✗ IP changed mid-session — sticky session not configured correctly")
If the IP changes between requests when you expect a sticky session, check the session ID format in your credentials and confirm you are using the correct port for sticky sessions rather than the rotating port.
Step 8: Real-World Test on Your Actual Target
All the tests above confirm the proxy is technically clean. But a proxy that passes every tool-based check can still fail on a specific target platform. Real-world testing on your actual target is the final verification step before running any production workflow.
Browser-Based Test (Instagram, TikTok, LinkedIn)
With the proxy active and the browser fingerprint configured, open your target platform in an incognito window or a fresh anti-detect browser profile. Do not log in yet. Browse the platform as a logged-out user for a few minutes: scroll the feed, open profiles, navigate between pages. If you hit a CAPTCHA, a login wall that is more aggressive than normal, or any prompt asking you to verify your location, the platform's detection is already scoring the session negatively.
Only proceed to login if the anonymous browsing session completes without friction. A session that starts with friction will not improve after login.
Python-Based Test
For scraping or API workflows, run a single request to your actual target domain through the proxy before committing to a full run. Check the response status code, the response body for CAPTCHA or block indicators, and the latency. A 200 response with clean content and acceptable latency means the proxy is ready for that target. A 403, 429, or a response containing CAPTCHA or "access denied" content means the IP is already flagged on that domain.
import requests

proxies = {
    "http":  "http://user:[email protected]:PORT",
    "https": "http://user:[email protected]:PORT"
}

headers = {"User-Agent": "Mozilla/5.0 (Linux; Android 14; Pixel 8) AppleWebKit/537.36"}

r = requests.get("https://your-target-domain.com", proxies=proxies, headers=headers, timeout=15)

print(f"Status: {r.status_code}")
if "captcha" in r.text.lower() or "access denied" in r.text.lower():
    print("✗ Blocked or challenged — IP flagged on this target")
else:
    print("✓ Clean response — proxy is ready for this target")
The IP may be clean on general reputation databases but flagged in the target platform's own internal blocklist. This happens when a specific subnet has been used heavily against that particular site. Request a replacement IP and re-test. If multiple replacements fail on the same target, the provider may not have suitable infrastructure for that platform.
What a Fully Passing Test Looks Like
IP routing: Different IP from your real one, in the expected location, with a carrier ISP name.
IP reputation: IPQualityScore fraud score 0-20, Spur shows no proxy flags, ASN is a carrier organization.
DNS leak: DNS servers belong to the proxy provider's infrastructure, not your home ISP.
WebRTC: No real IP visible in ICE candidates. Only the proxy IP appears.
Browser fingerprint: Timezone, language, and OS consistent with the proxy location. High consistency score on pixelscan.net.
Speed: Latency under 150 ms, consistent response times. No high-latency hops in mtr output.
Sticky session: Same IP across all five consecutive requests.
Real-world test: 200 response on target domain, no CAPTCHA, no block indicators.
Common Test Failures and What They Mean
How Often to Re-Test
Run a full test when you first set up a proxy. After that, re-test before any new campaign, after changing proxy configuration, after browser or OS updates, and at least monthly as a routine hygiene check. Browser updates can reset WebRTC and DNS settings. IP reputation can change if a subnet gets flagged. Proxy performance can degrade if the provider's infrastructure changes.
For high-stakes workflows, build IP verification into the automation itself: check the IP at the start of each session and halt if the returned IP does not match expectations.
Start with a Proxy That Passes Every Test
Power Proxy runs on dedicated carrier-grade mobile infrastructure with real carrier-assigned IPs, clean IP reputation, and 99.9% uptime. Every node is tested for IP reputation, DNS integrity, WebRTC safety, and carrier authenticity before deployment. Dedicated device, no shared bandwidth, no contaminated pools.
Narmin Kamilsoy
Contributing author sharing insights and stories on our blog.